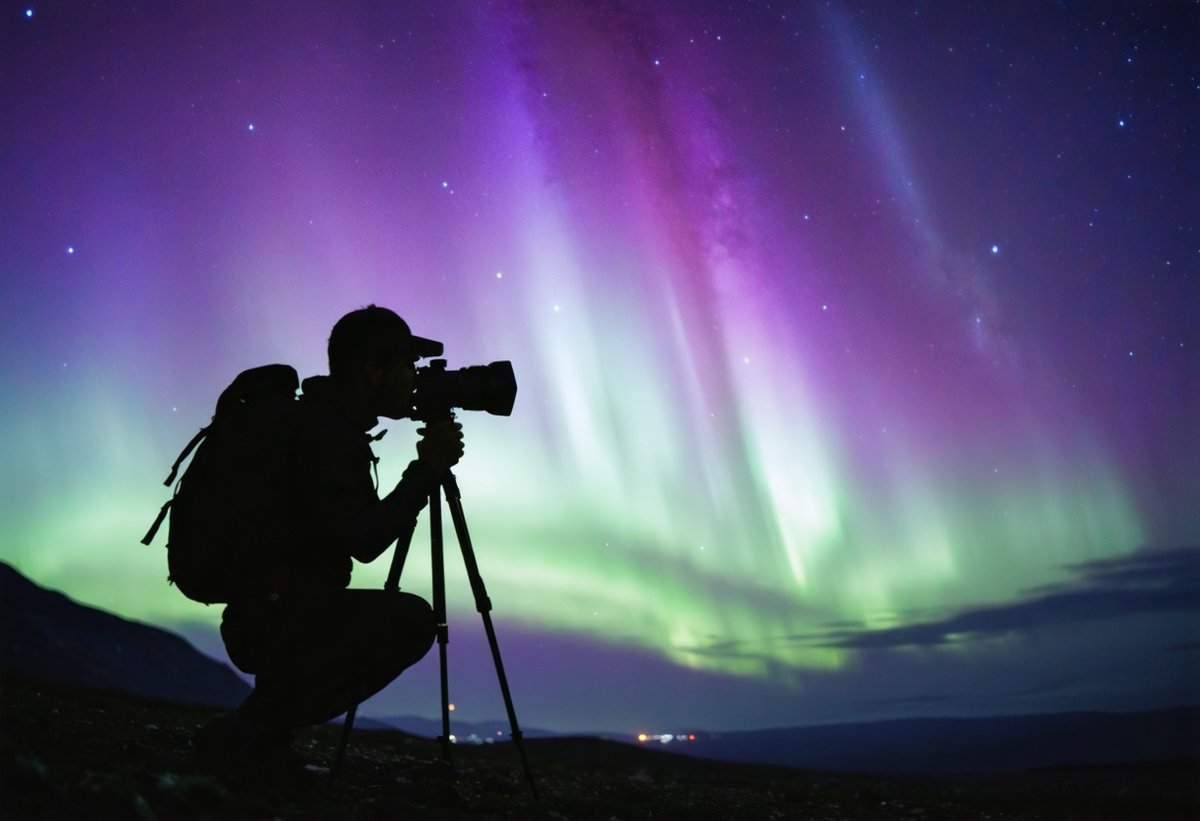
The night sky is putting on a show unlike anything we've seen in decades. As we move through 2025's solar maximum—the peak of our sun's 11-year activity cycle—aurora displays are dancing across skies at latitudes that haven't witnessed them in generations. From Kansas to the Mediterranean, photographers are stepping outside to find the heavens ablaze with color, and many are picking up cameras for the first time to capture these celestial wonders. Whether you're witnessing your first aurora or finally ready to photograph the Milky Way you've admired for years, this comprehensive guide will walk you through everything you need to know about astrophotography without breaking the bank.
Why 2025 Is the Perfect Year to Start Astrophotography
The sun operates on an approximately 11-year cycle of magnetic activity, and 2024-2025 marks Solar Cycle 25's peak. This means increased solar flares, coronal mass ejections, and—most excitingly for photographers—frequent and intense aurora borealis and australis displays at unusually low latitudes. According to NASA's Solar Dynamics Observatory, we're experiencing some of the most powerful geomagnetic storms in over two decades.1
Beyond auroras, the night sky offers year-round photographic opportunities: the Milky Way's galactic core visible from spring through fall, meteor showers, planetary conjunctions, and the timeless beauty of star-studded landscapes. The barrier to entry has never been lower—modern cameras, even budget models, possess capabilities that would have cost tens of thousands of dollars just a decade ago.
Essential Budget Gear for Night Sky Photography
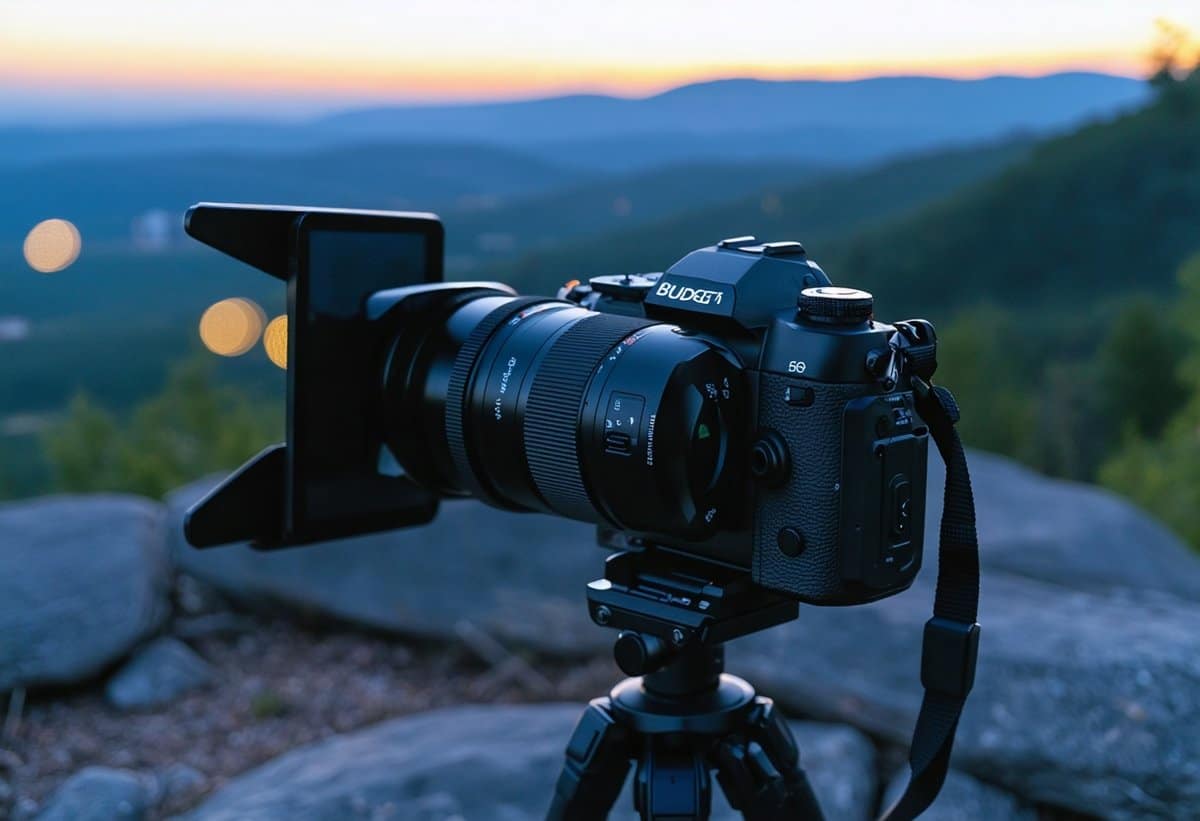
Let's address the elephant in the room: you don't need a $5,000 camera setup to capture stunning astrophotography. While professional gear offers advantages, today's entry-level equipment is remarkably capable in low-light conditions.
Camera Bodies: What Actually Matters
For astrophotography, your camera needs three key features: manual mode capability, the ability to shoot long exposures (15-30 seconds), and decent high-ISO performance. Nearly every interchangeable lens camera manufactured in the past five years meets these requirements, and many advanced compact cameras do as well.
Budget-Friendly Options ($400-$800):
- Used Sony a6000 series (a6000, a6100)
- Canon EOS Rebel T7i or T8i
- Nikon D3500 or D5600
- Fujifilm X-T200
The used market is your friend here. A three-year-old camera body performs virtually identically to its current-generation counterpart for night sky work, often at half the price. Full-frame sensors offer advantages in light gathering, but modern APS-C and Micro Four Thirds sensors produce excellent results when properly used.
Lenses: Your Most Important Investment
In astrophotography, lens choice matters more than camera body. You need a lens with a wide aperture (f/2.8 or wider) and a focal length between 14mm and 35mm for most night sky work. The wider the aperture, the more light reaches your sensor, allowing shorter exposures that minimize star trailing.
Recommended Budget Lenses:
- Rokinon/Samyang 14mm f/2.8 ($300-400) - Manual focus, sharp, excellent value
- TTArtisan 11mm f/2.8 ($200) - Ultra-wide option for APS-C
- Used kit lenses at 18mm f/3.5 - Not ideal but workable for beginners
- Vintage manual lenses (see our guide on vintage lenses for creative options)
The Rokinon 14mm f/2.8 has become legendary in the astrophotography community for delivering performance that rivals lenses costing three times as much. Yes, it's manual focus only, but for night sky work, you'll be focusing manually anyway.2
The Tripod: Don't Cheap Out Here
A sturdy tripod is non-negotiable for astrophotography. Those $30 flimsy models will frustrate you with camera shake and instability. Invest $100-200 in a solid aluminum tripod from brands like Manfrotto, Vanguard, or Benro. Your tripod should feel heavy and stable—if it's light enough to forget you're carrying it, it's probably too light for sharp 20-30 second exposures. For more on protecting your gear investment, check out our photography gear protection tips.
Additional Accessories Worth Having
- Remote shutter release or intervalometer ($15-40): Prevents camera shake when triggering the shutter
- Spare batteries ($30-50 each): Cold weather and long exposures drain batteries quickly
- Red headlamp ($15-25): Preserves your night vision while adjusting settings
- Dew heater strips ($40-60): Prevents condensation on your lens in humid conditions
- Star tracking app (free-$10): PhotoPills, Stellarium, or SkySafari
Understanding the Fundamentals: The Exposure Triangle for Night Sky
Night sky photography pushes your camera to its limits, requiring you to balance three exposure variables: aperture, shutter speed, and ISO. Unlike daytime photography where you have flexibility, astrophotography demands specific approaches to each.
Aperture: Wide Open
Use your lens's widest aperture—typically f/1.4, f/1.8, f/2.0, or f/2.8. Some photographers stop down to f/2.8 or f/4 for sharper corners, but when starting out, gather every photon you can. Modern post-processing can handle corner softness better than it can recover underexposed images.
Shutter Speed: The 500 Rule (and Its Modern Updates)
Stars appear stationary to our eyes, but Earth's rotation causes them to move across the frame during long exposures, creating trails rather than points of light. The classic "500 Rule" helps calculate maximum exposure time before trailing becomes noticeable:
Maximum Shutter Speed = 500 / (Focal Length × Crop Factor)
For a 14mm lens on a full-frame camera: 500 / 14 = 35 seconds
For a 14mm lens on APS-C (1.5x crop): 500 / (14 × 1.5) = 23 seconds
However, modern high-resolution sensors reveal trailing at these speeds. Many photographers now use the "300 Rule" or even "200 Rule" for pin-sharp stars, especially when planning to crop or print large.3
ISO: Embrace the Noise
With aperture maxed out and shutter speed limited by star trailing, ISO becomes your variable adjuster. Start with ISO 3200 and adjust from there. Modern cameras handle ISO 3200-6400 remarkably well, and noise reduction software like Adobe Lightroom, DxO PureRAW, or Topaz DeNoise AI can clean up grain in post-processing.
A noisy, properly exposed image always beats a clean, underexposed one. You can reduce noise; you can't recover detail that was never captured.
Camera Settings: Your Astrophotography Starting Point
Here's a baseline configuration for Milky Way and general night sky photography. These settings work for most situations and provide a solid starting point for experimentation.
Milky Way Photography Settings:
- Shooting Mode: Manual (M)
- Aperture: f/1.8-f/2.8 (widest your lens offers)
- Shutter Speed: 15-25 seconds (depending on focal length)
- ISO: 3200-6400
- White Balance: 3400-4000K (cooler for blue tones) or 4800-5600K (warmer)
- Focus: Manual, set to infinity
- Image Format: RAW (essential for post-processing flexibility)
- Image Stabilization: OFF (can cause blur during long exposures on a tripod)
- Long Exposure Noise Reduction: OFF (doubles capture time and drains batteries)
Aurora Photography Settings:
- Aperture: f/1.4-f/2.8
- Shutter Speed: 2-15 seconds (auroras move quickly; shorter exposures freeze motion)
- ISO: 1600-6400 (adjust based on aurora brightness)
- White Balance: 3200-4000K (preserves natural colors)
- Continuous shooting mode for capturing aurora movement
During intense aurora displays like those we're experiencing in 2025, you might use exposures as short as 1-3 seconds at ISO 3200. Bright auroras require less exposure time than you'd expect—treat them more like twilight photography than traditional night sky work.
Mastering Focus: The Make-or-Break Skill
Achieving sharp focus on stars challenges even experienced photographers. Autofocus doesn't work in darkness, and your lens's infinity mark often isn't precisely calibrated. Here's the reliable method professionals use:
The Live View Focus Method:
- Switch your lens to manual focus mode
- Enable Live View on your camera's LCD screen
- Point your camera at a bright star or distant light
- Use your camera's magnification function (usually 5x or 10x zoom in Live View)
- Slowly adjust focus until the star appears as the smallest, sharpest point possible
- Take a test shot and check at 100% magnification on your LCD
- If necessary, refocus and test again
- Once achieved, use tape to lock your focus ring in position
Some photographers mark their lens's optimal infinity focus point with a small piece of glow-in-the-dark tape or a paint pen for quick setup in the field. If you're interested in exploring how different techniques can enhance your night photography skills, our guide on night photography on vacation offers additional creative approaches.
Location, Location, Location: Finding Dark Skies
Light pollution is astrophotography's greatest enemy. The glow from cities washes out faint stars and reduces contrast in the Milky Way. Finding truly dark skies transforms your results from mediocre to magnificent.
Using Light Pollution Maps
The International Dark-Sky Association maintains resources for finding dark sky locations, including designated Dark Sky Parks and Reserves. Free tools like lightpollutionmap.info and the Dark Sky Finder app show light pollution levels worldwide using the Bortle Scale (1 being pristine dark sky, 9 being inner-city sky).
For Milky Way photography, aim for Bortle 4 or darker. For auroras during the 2025 solar maximum, even Bortle 5-6 locations can work during strong displays, though darker is always better.4
Timing Your Shoot
The moon is both friend and foe in astrophotography. A new moon (no moon visible) provides the darkest skies for Milky Way photography. A thin crescent moon can add beautiful foreground illumination. A full moon essentially ruins deep sky photography but can create ethereal landscape lighting.
For Milky Way core photography in the Northern Hemisphere, the galactic center is visible from March through October, with peak visibility from May through August. Plan shoots during the new moon phase and check rise/set times using apps like PhotoPills.
For auroras, timing depends on solar activity. Download apps like SpaceWeatherLive or Aurora Alerts that notify you of geomagnetic storms. During solar maximum, aurora opportunities can occur with little warning, so having your gear ready is essential.
Composition: Creating Compelling Night Sky Images
Technical excellence means nothing without compelling composition. The most memorable astrophotography images combine a stunning sky with an interesting foreground, creating context and scale that pure sky shots lack.
The Foreground Element
Include foreground elements that add interest, context, or story to your image: trees, rock formations, abandoned buildings, mountain silhouettes, or bodies of water reflecting the sky. Scout locations during daylight to identify compelling foregrounds and compositions.
The rule of thirds applies to astrophotography just as it does to landscape photography. Position the horizon in the lower third when emphasizing the sky, or in the upper third when the foreground is particularly interesting. The Milky Way's arc naturally creates leading lines that draw the eye through the frame.
Foreground Lighting Techniques
Your foreground will often be too dark in a single exposure. Professional astrophotographers use several techniques:
- Light painting: Using a flashlight or LED panel to selectively illuminate foreground elements during the exposure
- Twilight blending: Shooting the foreground during blue hour and the sky after full darkness, then blending in post-processing
- Multiple exposures: Taking separate exposures for foreground and sky, then combining them
- Natural light: Allowing moonlight, distant city glow, or aurora light to illuminate the foreground
For beginners, the simplest approach is shooting during astronomical twilight (when the sun is 12-18 degrees below the horizon) when faint ambient light still illuminates the landscape while stars are visible. This narrow window provides balanced exposures without complex post-processing.
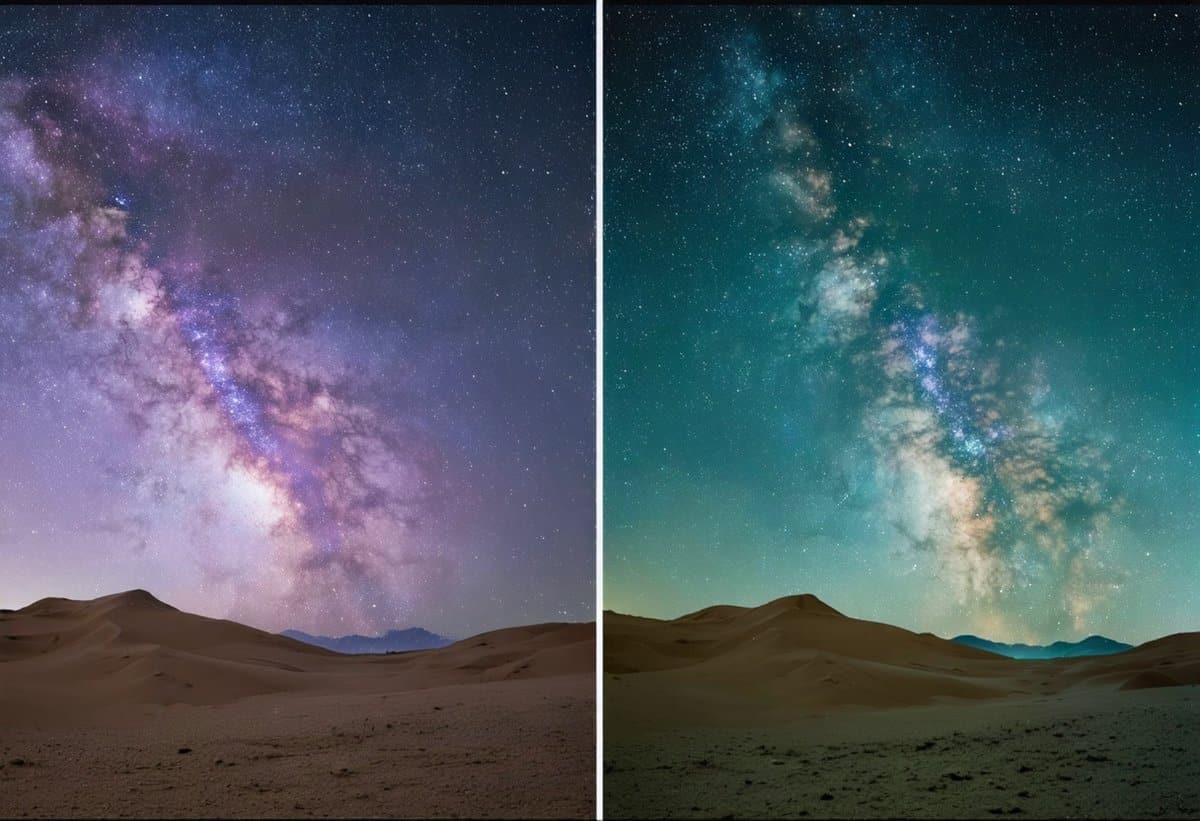
Post-Processing: Bringing Your Night Sky to Life
RAW files straight from camera look flat and underwhelming—this is normal. Astrophotography requires post-processing to reveal the data your camera captured. You're not creating something that wasn't there; you're revealing what your camera sensor recorded but your LCD screen can't adequately display.
Essential Adjustments in Lightroom or Camera Raw
Basic Panel:
- Increase Exposure: +0.3 to +1.0 stops (careful not to blow out highlights)
- Boost Contrast: +20 to +40 (brings out Milky Way structure)
- Increase Whites: +15 to +30 (makes stars pop)
- Decrease Blacks: -20 to -40 (deepens sky background)
- Add Clarity: +10 to +30 (enhances Milky Way detail, but don't overdo it)
- Increase Vibrance: +20 to +40 (brings out subtle colors in the Milky Way)
Detail Panel:
- Sharpening: Amount 40-60, Radius 1.0, Detail 25-35
- Noise Reduction: Luminance 30-50 (adjust to taste), Color 50-75
HSL Panel:
- Increase Blue and Aqua saturation to enhance Milky Way colors
- Decrease Orange and Yellow saturation to reduce light pollution color casts
- Adjust Luminance sliders to bring out different parts of the Milky Way structure
The key is subtlety. Overly processed images with neon colors and excessive contrast look artificial. Study images from respected astrophotographers on platforms like Astronomy Magazine to develop your aesthetic sense.5
Advanced Techniques: Stacking and Blending
Once you've mastered single exposures, explore stacking multiple images to reduce noise and increase detail. Software like Sequator (free), Starry Landscape Stacker ($40), or Photoshop can align and average multiple exposures, significantly improving image quality.
Take 5-10 exposures of the same composition without moving your camera, then stack them in post-processing. The signal (stars and Milky Way) reinforces while the noise (random pixel variations) cancels out, resulting in cleaner images that can withstand more aggressive processing.
Common Mistakes and How to Avoid Them
Every astrophotographer makes these mistakes initially. Learning from others' experiences saves frustration and wasted dark sky opportunities.
Mistake #1: Not Checking Focus
You'll never notice soft focus on your camera's LCD in the field. Always check focus at 100% magnification after your first few shots. Take a test shot, zoom in completely on a star, and verify it's a tight point of light. Recheck focus if you change lenses or accidentally bump the focus ring.
Mistake #2: Forgetting to Disable Image Stabilization
Image stabilization systems can introduce blur during long exposures on a tripod as they try to correct for movement that isn't happening. Always turn off IS/VR/VC when shooting on a tripod.
Mistake #3: Underestimating Cold Weather Impact
Batteries drain rapidly in cold weather. Bring at least two spares and keep them warm in an inside pocket. Condensation forms on equipment when bringing cold gear into warm environments—place cameras in sealed plastic bags before bringing them inside to prevent moisture damage.
Mistake #4: Shooting Only the Sky
Pure sky shots without foreground interest rarely resonate with viewers. Always include landscape elements that provide context, scale, and visual interest. The most shared and celebrated astrophotography images tell a story through the combination of earth and sky.
Mistake #5: Over-Processing
It's tempting to push sliders to extremes, creating images with electric colors and harsh contrast. Resist this urge. Subtle, naturalistic processing ages better and looks more professional. If you're unsure, process conservatively—you can always revisit the RAW file later.
Capturing the 2025 Aurora Displays
The 2025 solar maximum has already produced multiple aurora displays visible at latitudes that rarely see them. Here's how to maximize your chances of capturing these spectacular events.
Monitoring Aurora Forecasts
Aurora activity depends on solar wind reaching Earth's magnetosphere. The key metric is the Kp index (0-9 scale), which measures geomagnetic activity. Download aurora alert apps that notify you when the Kp index rises:
- Kp 5-6: Auroras visible at high latitudes (Canada, northern Europe, Alaska)
- Kp 7-8: Auroras visible at mid-latitudes (northern U.S., central Europe)
- Kp 9: Auroras potentially visible at low latitudes (southern U.S., Mediterranean)
During solar maximum, Kp 7+ events occur regularly. Set up alerts for Kp 6 or higher to ensure you don't miss opportunities. Auroras typically peak 1-2 hours after sunset and again around midnight to 2 AM.
Aurora Photography Technique
Auroras move and change rapidly, unlike the static Milky Way. Adjust your technique accordingly:
- Use shorter exposures (2-10 seconds) to freeze aurora movement
- Shoot in continuous mode during active displays
- Be prepared to adjust ISO quickly as aurora brightness fluctuates
- Compose with the northern horizon (or southern in the Southern Hemisphere) visible
- Include landscape elements for scale and context
During intense displays, you might use settings like f/2.8, 3 seconds, ISO 1600—much faster than typical night sky settings. The aurora's brightness can surprise you; don't be afraid to lower ISO or shorten exposure if your images are overexposed.
Building Your Skills: Practice and Progression
Astrophotography rewards patience and persistence. Your first attempts won't match the stunning images you've seen online—and that's perfectly normal. Those photographers have years of experience, multiple attempts at each location, and advanced post-processing skills.
Start with modest goals: achieve sharp focus, capture a properly exposed Milky Way, create a balanced composition with foreground interest. Each successful element builds your confidence and skills. Join online communities like the astrophotography subreddit or specialized Facebook groups where members share settings, locations, and constructive feedback.
Consider keeping a detailed log of your shoots: location, settings, conditions, what worked, and what didn't. This reference becomes invaluable as you develop your personal approach to night sky photography. The technical aspects become second nature with practice, allowing you to focus on creative vision and composition.
If you're drawn to capturing unique moments and developing your photographic eye, exploring techniques from other specialized fields can enhance your astrophotography. The patience required for solargraphy or the compositional skills from landscape work all translate to better night sky images.
Beyond the Basics: Where to Go Next
Once you've mastered fundamental astrophotography, numerous specialized directions await exploration:
- Star trails: Using exposures of minutes to hours to create circular star trail patterns around Polaris
- Time-lapses: Combining hundreds of images into videos showing sky movement
- Deep sky objects: Photographing nebulae, galaxies, and star clusters with telephoto lenses or telescopes
- Planetary imaging: Capturing detailed images of planets using specialized techniques
- Meteor shower photography: Positioning your camera during annual meteor showers to capture shooting stars
- Star tracker photography: Using motorized mounts to follow stars, allowing longer exposures without trailing
Each specialization requires additional equipment and techniques, but the fundamentals you've learned provide the foundation for all of them. The Royal Observatory Greenwich's Astronomy Photographer of the Year competition showcases the incredible diversity and artistry possible in astrophotography, offering endless inspiration.
The Magic Awaits Above
The 2025 solar maximum represents a once-in-a-decade opportunity to witness and photograph extraordinary celestial displays. Whether you're capturing your first aurora or finally photographing the Milky Way you've admired for years, the night sky offers endless photographic possibilities that don't require expensive equipment—just patience, preparation, and persistence.
Start with the budget gear recommendations in this guide, master the fundamental techniques, and venture out to dark sky locations. Your first successful astrophotography image—that moment when you see pin-sharp stars and the Milky Way's dusty lanes on your LCD screen—creates an addictive thrill that will have you planning your next night sky adventure before you've even left the field.
The universe is putting on a spectacular show in 2025. All you need to do is point your camera upward, press the shutter, and capture the magic that's been waiting above us all along. Clear skies and sharp focus!
[efn_list]
- The last comparable solar maximum occurred in 2001-2002, but smartphone cameras and accessible digital photography have made the 2025 maximum far more documented by amateur photographers.
- Autofocus systems struggle in low light conditions. Manual focus using live view magnification produces more reliable results for astrophotography.
- The appropriate rule depends on your sensor resolution, final output size, and personal standards. A 45-megapixel sensor will show trailing that a 16-megapixel sensor masks at the same exposure duration.
- The Bortle Scale ranges from Class 1 (excellent dark sky) to Class 9 (inner-city sky). Each class represents approximately a doubling or halving of sky brightness compared to adjacent classes.
- Professional astrophotographers often process images to match what the human eye would see if it had the sensitivity of a camera sensor—revealing colors and details that exist but are too faint for our eyes to perceive in real-time.