Infrared Magic: Capturing Hidden Worlds with Your Camera
Have you ever pondered what lies beyond the visible spectrum of our world? Infrared photography unveils this hidden dimension, offering a captivating glimpse into realms usually concealed from the human eye. This unique art form transforms the ordinary into the extraordinary, allowing photographers to craft scenes drenched in ethereal light. Prepare to enter a world where leaves glow white, skies darken, and every scene carries a hint of mystery. Welcome to the enchanting universe of infrared magic—a technique that challenges conventional photographic aesthetics and opens new creative possibilities.
Unveiling the Unseen: Infrared Photography Basics
Infrared photography is the craft of capturing images using infrared light, which exists just beyond the red end of the visible spectrum, typically between 700 and 1200 nanometers. Unlike conventional photography dependent on visible light (400-700 nanometers), infrared photography harnesses light waves invisible to the naked eye. This results in surreal, otherworldly images where foliage appears snowy white, and skies adopt an intense, otherworldly darkness. It’s akin to stepping into a parallel universe where familiar landscapes morph into dreamlike visions.
To embark on this journey, understanding the fundamentals is crucial. Infrared light interacts uniquely with various objects, creating the signature look of IR photos. For instance, chlorophyll in plants reflects a significant amount of infrared light—sometimes up to 70-80%—causing foliage to appear white or light-colored in IR images. Conversely, the sky, which contains minimal infrared light, looks almost black. Water bodies often appear dark and mirror-like, while clouds retain their brightness, creating dramatic contrasts. Grasping these principles will help you predict how different elements in a scene will appear, enabling you to compose truly magical shots.

The science behind infrared photography dates back to the early 20th century when it was first used for scientific and military purposes. Today, it has evolved into a respected artistic medium that challenges our perception of reality and reveals the world in ways our eyes never could. Much like how post-documentary photography blurs the lines between reality and fiction, infrared imaging presents an alternative reality that’s simultaneously real and surreal.
Gear Up: Essential Tools for Infrared Adventures
Embarking on an infrared adventure requires specific gear, but fear not—it’s simpler than it seems. The most vital piece of equipment is a camera capable of capturing infrared light. Some photographers opt to modify an existing camera by removing its infrared-blocking filter—a delicate process best left to professionals like LifePixel or Kolari Vision. Alternatively, you can purchase a camera specifically designed for IR photography or use an IR filter with your regular camera. Each option has its benefits, so choose one that aligns with your budget and comfort level.

Camera Conversion vs. Filter Method
The camera conversion method involves permanently removing the internal IR-blocking filter and replacing it with an infrared-passing filter. This approach offers several advantages: faster shutter speeds, the ability to shoot handheld, and easier focusing through the viewfinder. Converted cameras typically cost between $300-$500 for the conversion service, making an older DSLR an excellent candidate for this transformation.
The filter method, on the other hand, involves attaching an infrared filter (such as the Hoya R72, B+W 092, or Kolari Vision filters) to your lens. This approach is more budget-friendly initially but requires significantly longer exposure times—often 30 seconds or more in bright daylight—and necessitates a tripod for sharp results. The advantage is versatility: you can switch between normal and infrared photography with the same camera.
Additional Essential Equipment
In addition to the camera, several other tools are indispensable. An infrared filter is essential if you’re not using a modified camera. These filters block visible light (typically wavelengths below 665nm, 720nm, or 850nm) and allow only infrared light to reach your camera’s sensor. The 720nm filter is the most popular choice for artistic photography, creating the classic “Wood Effect” where foliage glows white.
Tripods are invaluable in infrared photography because IR filters can significantly reduce light entering the lens, necessitating longer exposure times. A sturdy tripod from manufacturers like Manfrotto or Gitzo will ensure your surreal scenes remain sharp. A remote shutter release or your camera’s built-in timer can help avoid shake or blur during long exposures.
Lastly, good editing software is crucial for post-processing your images to reveal the full spectrum of ethereal beauty. Adobe Lightroom and Photoshop are industry standards, allowing you to swap color channels, adjust white balance, and fine-tune contrast to achieve that otherworldly aesthetic. The J. Paul Getty Museum has an extensive collection of experimental photography that demonstrates how alternative processes, including infrared, have shaped contemporary visual culture.
Snap the Surreal: Techniques to Master IR Shots
Mastering infrared photography requires practice and patience, but the results are worth the effort. A key technique is to shoot during midday when the sun is highest—typically between 10 AM and 2 PM. Unlike conventional photography, which often benefits from the golden hours of sunrise and sunset, infrared photography thrives on bright, direct sunlight. Infrared light is more abundant during these times, creating dramatic contrasts and enhancing the ethereal quality of your images. This counterintuitive approach to lighting makes infrared photography particularly exciting for photographers looking to break free from traditional rules.
Camera Settings and Exposure
Experimenting with camera settings is also crucial. Infrared photography often demands longer exposure times, especially when using an IR filter, so be prepared to adjust your ISO, aperture, and shutter speed settings. Start with a low ISO (100-400) to minimize noise, and adjust your aperture to achieve the desired depth of field. Many infrared photographers prefer apertures between f/8 and f/16 to maximize sharpness across the frame, as IR light focuses differently than visible light, sometimes causing a focus shift.
Since IR photography can produce unpredictable results, bracketing your shots—taking multiple exposures at different settings—can help capture the perfect image. Don’t forget to shoot in RAW format to provide the most flexibility in post-processing, where you can fine-tune colors and contrasts to achieve that magical, otherworldly look. If you’re using a filter method, expect exposure times of 5-30 seconds in bright daylight, and adjust accordingly for changing light conditions.
Focusing Challenges and Solutions
One of the most frustrating aspects of infrared photography is focusing. Because infrared light has a longer wavelength than visible light, it focuses at a slightly different point. If you’re using a converted camera, you can typically focus normally through the viewfinder or use live view. However, with the filter method, you must focus before attaching the filter, as the viewfinder will be completely dark once the IR filter is in place.
Many lenses have an infrared focusing mark (a red dot or line) on the focusing ring. After focusing in visible light, note the distance and shift the focus ring to align that distance with the IR mark. Alternatively, use live view focusing if your camera supports it, though this can be challenging with dense IR filters. Some photographers find that using a slightly smaller aperture (f/11 or f/16) increases depth of field enough to compensate for minor focus discrepancies.
Ideal Subjects and Compositions for Infrared Photography
Not all subjects translate equally well to infrared photography. Understanding which scenes work best will dramatically improve your success rate and creative satisfaction. Landscapes with abundant foliage are the quintessential infrared subject. Parks, forests, gardens, and tree-lined streets become transformed into snowy wonderlands even in the height of summer. The contrast between bright white foliage and dark skies creates an almost supernatural atmosphere.
Architectural photography takes on new dimensions in infrared. Historic buildings, modern structures, and urban landscapes gain dramatic presence when rendered in IR. Stone, brick, and concrete often appear lighter than in visible light, while glass and metal can create interesting reflective effects. The absence of color distractions allows architectural forms and textures to become the primary focus, similar to how moody photography uses shadow and contrast to create compelling narratives.
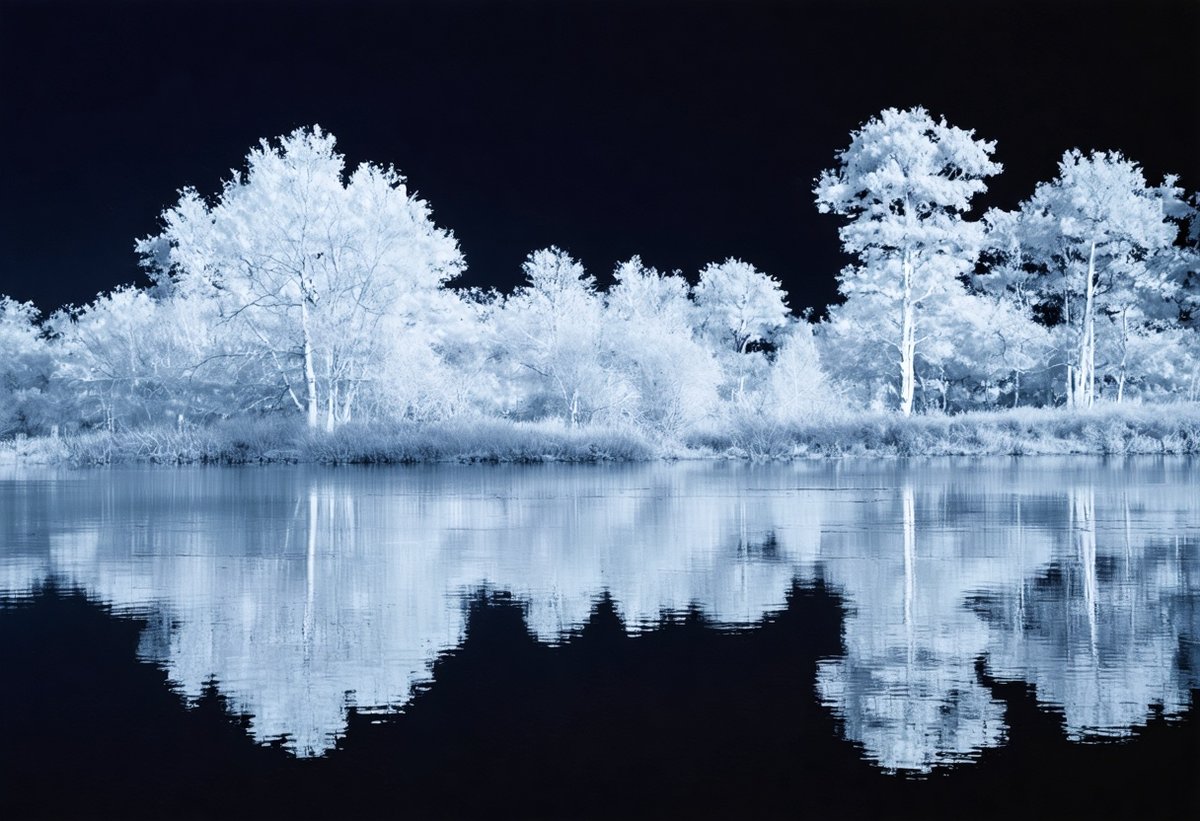
Water scenes offer compelling opportunities as well. Lakes, rivers, and oceans appear dark and mysterious in infrared, often with a glass-like quality that contrasts beautifully with bright clouds and vegetation along the shoreline. Long exposures can smooth water surfaces into ethereal planes that enhance the dreamlike quality of IR images.
Portrait photographers have also embraced infrared for its unique aesthetic. Skin tones in IR can appear luminous and porcelain-like, though achieving flattering results requires careful attention to exposure and post-processing. Veins and blemishes may become more visible, so additional retouching is often necessary. The Royal Photographic Society has documented numerous historical applications of infrared photography, including its use in fine art portraiture.
Post-Processing: Bringing Your Infrared Vision to Life
The magic of infrared photography truly comes alive in post-processing. Raw infrared images straight from the camera typically appear red or magenta-tinted and require significant adjustment to achieve the classic look most photographers desire. Understanding the post-processing workflow is essential to realizing your creative vision.
The Channel Swap Technique
The most fundamental post-processing technique for infrared images is the channel swap, which exchanges the red and blue color channels. In Photoshop, this is accomplished through the Channel Mixer adjustment. Set the Red channel to 0% Red and 100% Blue, then set the Blue channel to 100% Red and 0% Blue. This swap transforms the initial red-tinted image into one with blue skies and white foliage—the iconic infrared look.
After the channel swap, adjust the white balance to neutralize any remaining color casts. Many photographers prefer a slightly warm or cool tone to enhance the mood. Experiment with the temperature and tint sliders until you achieve a pleasing result. Some prefer the classic black-and-white conversion, which emphasizes tonal contrast and texture without color distractions.
Enhancing Contrast and Detail
Infrared images benefit from enhanced contrast to emphasize the dramatic tonal separation between elements. Adjust the contrast slider, blacks, and whites to create separation. The clarity and texture sliders can enhance detail in foliage and clouds, though use them judiciously to avoid an over-processed appearance.
Dodging and burning—selectively lightening and darkening areas—can guide the viewer’s eye through the composition. Brighten key areas like sunlit foliage while darkening skies or shadow areas to increase drama. Graduated filters can help balance exposure between bright foliage and darker skies.
Many infrared photographers also embrace creative color grading, producing images with surreal color palettes—golden yellows, deep teals, or vibrant magentas. These artistic interpretations push infrared photography beyond documentary representation into purely expressive territory, much like contemporary approaches in portrait photography aesthetics that prioritize mood over literal representation.
Common Challenges and How to Overcome Them
Like any specialized photographic technique, infrared photography presents unique challenges. Being prepared for these obstacles will help you avoid frustration and achieve better results more quickly.
Hotspots and Lens Selection
One of the most common issues in infrared photography is the appearance of hotspots—bright, washed-out areas typically in the center of the image caused by internal lens reflections. Not all lenses perform equally in infrared; some are notorious for producing severe hotspots while others handle IR light beautifully.
Wide-angle lenses are particularly prone to hotspots, while telephoto lenses generally perform better. Before committing to infrared photography, research which lenses work well with IR light. Online communities and forums dedicated to infrared photography maintain databases of lens performance. Prime lenses often outperform zooms in IR applications.
Vignetting and Edge Softness
Infrared images often exhibit more pronounced vignetting (darkening at the edges) than visible light photos. While some vignetting can enhance the dreamlike quality, excessive darkening may be distracting. Most editing software includes vignetting correction tools that can address this issue. Alternatively, embrace the vignetting as part of the infrared aesthetic.
Edge softness is another characteristic of IR photography due to chromatic aberration and the way infrared light focuses. Stopping down your aperture to f/11 or f/16 can help maintain sharpness across the frame. In post-processing, selective sharpening of central areas while accepting softer edges can create a pleasing result.
Creative Applications and Artistic Vision
Beyond the technical aspects, infrared photography offers profound creative possibilities. The medium naturally lends itself to certain artistic visions and can dramatically expand your photographic repertoire.
Infrared excels at creating atmospheric, contemplative images that evoke emotion and mystery. The otherworldly quality naturally suits fine art photography, where the goal is expression rather than documentation. Many contemporary photographers use infrared to explore themes of memory, time, and altered perception—concepts that resonate with the medium’s ability to show familiar subjects in unfamiliar ways.
The technique also works beautifully for minimalist compositions. The simplified tonal palette and dramatic contrast between elements help reduce scenes to their essential forms. A single tree against a dark sky, a winding path through bright foliage, or architectural details isolated by tonal contrast—these subjects become powerful statements in infrared.
Some photographers combine infrared with other alternative processes or experimental techniques, creating hybrid approaches that push boundaries further. Long exposures that blur clouds and water, multiple exposures that layer IR and visible light images, or composite techniques that integrate infrared elements into conventional photographs—all represent exciting creative frontiers. The Museum of Modern Art’s photography collection includes numerous examples of experimental photography that demonstrate how technical innovation drives artistic evolution.
Learning Resources and Community
As you develop your infrared photography skills, connecting with the broader IR photography community can accelerate your learning and provide inspiration. Numerous online forums, social media groups, and websites are dedicated to infrared photography, where practitioners share techniques, troubleshoot problems, and showcase their work.
Books on infrared photography provide comprehensive technical and artistic guidance. Titles like “Infrared Photography: Artistic Techniques for Brilliant Images” by Cyril Harnischmacher offer detailed instruction on both film and digital IR photography. Online tutorials and YouTube channels dedicated to the technique provide visual demonstrations of workflows and techniques.
Workshops and photography tours focused on infrared can provide hands-on learning opportunities and access to expert instruction. These immersive experiences allow you to practice techniques in optimal locations while receiving immediate feedback. Many professional photography organizations, including the American Society of Media Photographers, occasionally feature infrared specialists in their educational programming.
Discovering the Hidden Treasure of Infrared Photography
Diving into the world of infrared photography is like discovering a hidden treasure trove of visual wonders. With the right gear, technical understanding, and creative vision, you can transform everyday scenes into surreal, dreamlike visions that captivate and inspire. Whether you’re a seasoned photographer seeking a new challenge or a curious novice eager to explore, infrared photography offers a unique and endlessly rewarding creative outlet.
The journey begins with understanding the fundamental principles of how infrared light interacts with the world, continues through mastering the technical challenges of capture and processing, and ultimately leads to developing your own artistic vision within this specialized medium. Each infrared image you create reveals something invisible to normal sight—a hidden dimension of reality that exists all around us, waiting to be discovered.
So, grab your camera, don your IR filter or convert that old DSLR, and step into a world where the invisible becomes visible, and the ordinary becomes extraordinary. Experiment boldly, embrace the unpredictable nature of the medium, and allow yourself to see the world through this magical lens. The hidden worlds of infrared await your discovery. Happy shooting!